Harvest Time!
We were at the hop farm this weekend for my wife's PhD party when I noticed that several vines are ready for harvesting. Actually, there were more hops ready than I can possibly handle to process. Next year, I simply have to make a large dehydrator. Today we picked about a pound or so of chinook and centennial hops (that's what it will amount to after dehydration). Here's the current view of the farm. All but one mound has grown (the bottom row chinook that was torn up by rabbits). Magnum, as usual has just started cone production. Though the top row centennial had trouble getting started this year, its counter part on the bottom row is nearly ready for harvest. I picked all I could from the top row which was completely ready.
 Of course, its always nice to have help. My wife, Dr. Michelle, and Dr. Courtney (I don't think I could have found smarter assistants!) helped pick the chinook. There were so many to pick that I had to tell them to stop. Our dehydrator can only hold so much and while I can lay out hops on tables in the house to start drying, we're leaving for Hawaii on Friday. I want to make sure everything is dehydrated and vacuum sealed by then.
 Above is a view of the top wire chinook. A few weeks ago, these were just getting started. The density is likely attributed to a good watering schedule and a good manure base at the season start.
 I'm always impressed with the size of the chinook hops we grow. They are large, healthy, and very abundant. Also, their stability for storage is amazing. In the background are the hops that didn't fit in the dehydrator. They'll need to wait for about 48 hours before being moved to dehydrator.
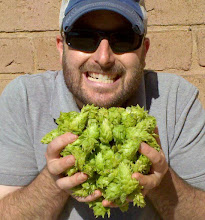
 Here's one of the bigger of the chinook cones. In my last blog, people wanted to know if I had small hands. Very good question since it seems unlikely to have a hop cone the length of any finger. I wouldn't call my hands small by they aren't large either. My glove size is typically small to medium.
 If my hand doesn't give you a sense of how big these cones are, then perhaps this will better scale the chinook hops.
 Here's the dehydrator we use. The capacity is great for its compact size. Considering that we only use it for hops, it readily fits in a cabinet for storage during the rest of the year. Though building a larger dehydrator will be very necessary next year, this works for smaller batches.
 A nicer dehydrator can be a bit expensive, even for a used one on eBay. To dehydrate hops, it is very important that no heat is applied. I keep our dehydrator at 85 where it produces no heat. The only heat comes from the electrical fan in operation. I feel like I've posted all these details in my last blog, dejavu! This dehydrator has settings for other applications but we only used it for hops.
 Above you can see the four racks in the dehydrator. Next harvest, I'll show how much surface area this particular model has. I think the racks are 1 foot by 1 foot but they might be a bit bigger. Straight off the vine, hops typically need about 48 hours. The hops on the table will only need about 24 hours.


