Showing posts with label chillindamos. Show all posts

Thursday, February 9, 2012

B3 2050 BrewSculpture is Here!

The new system has arrived and homebrewing has elevated to a new level.  The MoreBeer 2050 BrewSculpture was ready ahead of time and it was difficult to wait through the holidays for the opportunity to fire it up.
The first of many homebrews, B3 2050 BrewSculpture.
As with any upgrade or new location, I anticipated a rough start.  I wasn't even sure if the BrewSculpture would fit through the doorway since specs slightly exceeded the width of our garage door.  I decided that I would test and scrub everything on one day before committing to a brew day.  Luckily, it fit through the door and was moderately manageable to move the stand to my existing brewing location.  With the kettles and everything loaded, the weight is insane.  Just the stand, moving around is quite easy.
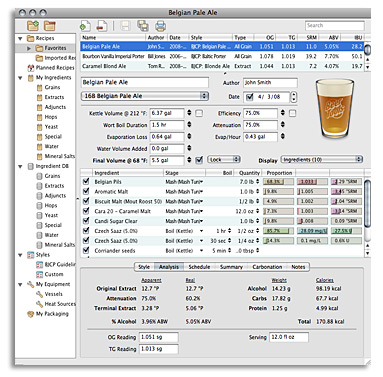
After a thorough scrub and testing of all systems (pumps, float switches, temp gauges, gas lines, digital burner, probes), it was a GO for Inaugural Pale Ale.  Here's the homebrew recipe:
Chillindamos Homebrew Recipe
Inaugural Pale Ale
American Pale Ale

BJCP: 10A
Date: 01/14/2012
Type: All Grain
Brewer: Sean
Batch Size: 10.00 gal
Asst Brewer:
Boil Time: 90 min
Equipment: B3 2050
Est Original Gravity: 1.057 SG
Measured Original Gravity: 1.057 SG
Est Final Gravity: 1.012 SG
Measured Final Gravity: 1.007 SG
Estimated Alcohol by Vol: 6.0 %
Actual Alcohol by Vol: 6.6 %
IBUs (Tinseth’s): 42.9 IBUs
Est Color: 5.9 SRM
Total Hop Weight: 8.00 oz
Calories: 187.8 kcal/12oz
Description:

Ingredients

Amt Name Type # %/IBU
17.30 gal SD/RO 70/30 Water 1 -
1.00 tbsp pH 5.2 Stabilizer (Mash 60.0 mins) Water Agent 2 -
17 lbs Rahr 2 Row Malt (2.0 SRM) Grain 3 81.0 %
2 lbs Munich Malt (9.0 SRM) Grain 4 9.5 %
1 lbs Caramel/Crystal Malt - 20L (20.0 SRM) Grain 5 4.8 %
1 lbs White Wheat Malt (2.4 SRM) Grain 6 4.8 %
1.00 oz Nugget [13.00 %] - Boil 60.0 min Hop 7 22.1 IBUs
1.00 Items Whirlfloc Tablet (Boil 15.0 mins) Fining 8 -
0.50 tsp Irish Moss (Boil 10.0 mins) Fining 9 -
2.00 oz Centennial [10.00 %] - Boil 10.0 min Hop 10 12.3 IBUs
1.00 oz Cascade [6.60 %] - Boil 10.0 min Hop 11 4.1 IBUs
1.00 Items Servomyces (Boil 10.0 mins) Other 12 -
2.00 oz Cascade [6.60 %] - Boil 5.0 min Hop 13 4.5 IBUs
2.00 oz Cascade [6.60 %] - Boil 0.0 min Hop 14 0.0 IBUs
2.0 pkg California Ale (White Labs #WLP001) [35.49 ml] Yeast 15 -

Mash Steps

Name Description Step Temperature Step Time
Mash In Add 27.30 qt of water at 165.3 F 152.0 F 60 min
Mash Out Heat to 162.0 F over 10 min 162.0 F 0 min
Mash Type: Single Infusion, Light Body, No Mash Out
Total Grain Weight: 21 lbs
Sparge Temperature: 168.0 F
Pre-boil Volume: 11.15 gal


Days in Primary: 4.00
Primary Temperature: 66.0 F
Days in Secondary: 10.00
Secondary Temperature: 60.0 F
Days in Tertiary: 7.00
Tertiary Temperature: 65.0 F


Carbonation Type: Keg
Volumes of CO2: 2.3
Pressure/Weight: 12.54 PSI
Carbonation Used: Keg with 12.54 PSI
Keg/Bottling Temperature: 45.0 F
Storage Temperature: 45.0 F

Notes: Pale Ale, such an under appreciated style these days. Especially in San Diego, where I like to tell people that IPA flows out of drinking fountains, pale ale just sounds ordinary. As one of my favorite beers styles, I haven't brewed a pale ale in such a long time. I wanted to brew a great first beer on the new MoreBeer B2050 BrewSculpture and pale ale was very appropriate.
Suprisingly, the brew day went very smooth. Over a decade of homebrewing enabled a fairly easy transition. Hops at 0 minutes were used in a Hop Rocket. Nugget and part of the Cascade hops were homegrown by Travis. Centennial from my farm.
Created with BeerSmith

There were a few minor hiccups during the first brew but nothing that hindered the bulk of the process.  I was having way too much fun to really care about the details.  The second batch had to wait a few weeks but by then all the kinks were worked out.
Getting ready to heat up the mash liquor.
California Common was next on the homebrew list.  An observer on this day would have probably noted that it would have appeared that I had been using this system for years.  Everything went extremely well.  I don't even think we spilled any grain during the tippy clean-up.  Clean-up is a bit more involved than before but luckily Kara helped out both brews.  After this batch, I'm ready to ramp up the production if needed for sheer quantity and experimentation.
Chillindamos Homebrew Recipe
Start Your Steam Engines
California Common Beer

BJCP: 7B
Date: 02/02/2012
Type: All Grain
Brewer: Sean
Batch Size: 10.00 gal
Asst Brewer:
Boil Time: 90 min
Equipment: B3 2050
Est Original Gravity: 1.066 SG
Measured Original Gravity: 1.065 SG
Est Final Gravity: 1.021 SG
Measured Final Gravity: 1.014 SG
Estimated Alcohol by Vol: 6.0 %
Actual Alcohol by Vol: 6.7 %
IBUs (Tinseth’s): 32.6 IBUs
Est Color: 12.0 SRM
Total Hop Weight: 6.00 oz
Calories: 219.2 kcal/12oz
Description:

Ingredients

Amt Name Type # %/IBU
23.50 gal SD/RO 70/30 Water 1 -
0.50 tbsp pH 5.2 Stabilizer (Mash 60.0 mins) Water Agent 2 -
17 lbs 16.0 oz Rahr Malting 2-Row (1.8 SRM) Grain 3 71.6 %
4 lbs Belgian Munich (9.0 SRM) Grain 4 15.9 %
1 lbs British Crystal Malt (70.0 SRM) Grain 5 4.0 %
1 lbs Crystal Malt - 20L (20.0 SRM) Grain 6 4.0 %
1 lbs Victory Malt (25.0 SRM) Grain 7 4.0 %
2.1 oz Chocolate Malt (350.0 SRM) Grain 8 0.5 %
1.50 oz Northern Brewer [7.50 %] - Boil 60.0 min Hop 9 18.0 IBUs
1.00 tsp Irish Moss (Boil 15.0 mins) Fining 10 -
1.00 Items Whirlfloc Tablet (Boil 15.0 mins) Fining 11 -
2.25 oz Northern Brewer [7.50 %] - Boil 15.0 min Hop 12 13.4 IBUs
1.00 Items Servomyces (Boil 10.0 mins) Other 13 -
2.25 oz Northern Brewer [7.50 %] - Boil 1.0 min Hop 14 1.2 IBUs
1.0 pkg San Francisco Lager (White Labs #WLP810) [35.49 ml] Yeast 15 -

Mash Steps

Name Description Step Temperature Step Time
Infusion Add 43.47 qt of water at 167.7 F 154.0 F 60 min
Mash Step Heat to 168.0 F over 20 min 168.0 F 5 min
Mash Type: SMART 154 and Mash Out
Total Grain Weight: 25 lbs 2.1 oz
Sparge Temperature: 168.0 F
Pre-boil Volume: 12.56 gal


Days in Primary: 14.00
Primary Temperature: 60.0 F
Days in Secondary: 10.00
Secondary Temperature: 65.0 F
Days in Tertiary: 7.00
Tertiary Temperature: 65.0 F


Carbonation Type: Keg
Volumes of CO2: 2.5
Pressure/Weight: 12.27 PSI
Carbonation Used: Keg with 12.27 PSI
Keg/Bottling Temperature: 40.0 F
Storage Temperature: 40.0 F

Notes: This time of year, from a combination of old plaster walls and wood floors, the house fermentation area maintains a consistent 58-60°F. Too cold for ales and too warm for lagers but close enough for a hybrid yeast strain such as White Labs WLP810 San Francisco Lager to thrive. Recipe formulation started with Jamil's recipe shared during his Brewing Network podcast on brewing California Common.
Created with BeerSmith

Saturday, February 19, 2011

Chillin' The Most

Just did a quick search to find these gems:

My kind of shirt. Have one already!
My kind of flag. Need one.
My kind of boat. Can't afford.

Friday, December 31, 2010

Happy Brew Year's

Happy Brew Year's!
2010 was a great year of homebrewing.  My primary focus was brewing to style and in doing so, I certainly expanded my brewing horizons.  Previously, I typically brewed to my heart's content.  My recipe formulation followed only rough parameters, inspired mostly by my current stock of ingredients.  Using the BJCP guidelines, I have tried to stay within target of a particular style.  Another goal was to begin participating in evaluations and competitions to gain honest feedback.  This past year, I entered a few beers in competition and sought out evaluations of my homebrew.  Honest and experienced feedback has been critical to developing my craft.
Speaking of competition!  Up until this fall, I was hoping to unleash a large handful of beers in this coming year's competition season, mostly our club-sponsored AFC competition and NHC.  With my wife's company shutting down and a little brewer on the way (end of March), we have since had to eliminate any unnecessary expenses.  Unfortunately, this means no competition entries this year.  We simply can't justify $10-$15 entry fees.  Bummer, huh?  Homebrewing on the other hand is decidedly cheaper than purchasing one of the household staples, beer.  Despite rough times, I'm just lucky to continue brewing to some extent!
Our latest "brew".  Some say it looks like he already has a beer in hand.
The New Year's brings resolutions and I have a two to address.  The first being to adjust brewing water.  At over 90% of beer volume, water takes a primary role.  The last time I considered adjusting my brewing water, I think I simply focused on the fact that many good homebrewers and some pro brewers use only their local tap water.  I've always filtered my water but haven't considered the rest of the details.  The second resolution is using brewing software.  I decided to start using Beer Tools.  I would have considered ProMash or Beer Smith and actually downloaded their trials.  I use a desktop Mac at home for all of my homebrewing digital needs: research, brewing related email, images, beer labels, calculations, blogging, and now Twitter.  Since Beer Tools is the only choice on a Mac, it was a no brainer.

My Brew Year's Resolution: Brewing Water and Software
Brew Year's Resolution #1 - Adjust Brewing Water
After 10 years of homebrewing, considering water critically as a brewing ingredient is long overdue. At this point, I'm in the research phase.  I've asked my homebrew club's email listserv to see if there's a definitive guide for adjusting water.  This simple answer was, no.  Adjusting brewing water seems to have the same range of involvement as brewing beer itself.  You can simply use tap water (or a homebrew kit) or become insanely involved.  As a science teacher with some background in chemistry, how hard can it be!?  Here's the collection of links from my QUAFF buddies:

John Palmer's How to Brew Chapter 15 - Understanding the Mash pH
Chapter 15.0 - What Kind of Water Do I Need? Chapter 15.1 - Reading a Water Report Chapter 15.2 - Balancing the Malts and Minerals Chapter 15.3 - Residual Alkalinity and Mash pH Chapter 15.4 - Using Salts for Brewing Water Adjustment

From Kai at BrauKaiser.com - Various Water Recipes - Beer color, alkalinity, and mash pH - effect off water and grist on mash pH (PDF)
Thanks Joe!

Another QUAFF member, Kim, wrote an interesting reply that I will simply quote:
Hi Sean,

I think John Palmer's How To Brew 3rd ed, chapter 15 is a great starting point for water chemistry.

In addition to Joe's links, AJ Delange has a site with a lot of technical depth (and things about Newfoundland dogs)
http://ajdel.wetnewf.org:81/ His spreadsheet is a beast! It has a 66 page users' manual for how to use it! (No, I haven't read it all.) Presumably a lot of that is theory... The alkalinity and water recipe documents may be of interest, and there are other goodies in there too.

AJ also contributes a lot on the brewnetwork's forums, especially with respect to water. Here's a (very!) recent thread about errors in John Palmer's water spreadsheet, but also about how it's not as disastrous as the bad math makes it seem: http://www.thebrewingnetwork.com/forum/viewtopic.php?f=6&t=23205 I'm hoping that the math/chemistry in the book is just fine, and that the errors are really in the formulas in the spreadsheet.

As far as I can tell, there isn't a single definitive resource for water chemistry. The lesson I get form it is that there are general correlations in the amounts of our brewing ions and the outcomes, but it's not as cut-and-dried as the formulas indicate. For example, 20ppm sulfate to 10 ppm chloride won't have the same effect as 200ppm to 100ppm. And Kai "Braukaiser" Troester's research (Joe linked to it) indicates that pound-for-pound, crystal malts actually acidify the
mash more than roasted malts, the opposite of what I had learned. You know, Dublin's classic style is stout, with generous use of roasted malts to counter the high carbonate water. Still, they are good starting points for later tweaking, just like pretty much everything else in brewing ;)

Cheers,
Kim
4-Part Podcast on Brewing Water:

On the Brewing Network, the podcast show, Brew Strong, has a four-part series on brewing water.  If you're a beer-brewing geek and haven't already found Jamil and John's awesome Brew Strong podcasts, I'd highly recommend subscribing and perusing the archives.  I've found that these podcasts are a go-to resource for exploring different aspects of brewing beer.  Here's the link to subscribe to the Brew Strong podcasts.
Another QUAFF buddy, Brian, reminded me of this "Waterganza" series on Brew Strong:
Podcast 1 - Why Adjust Your Water - Podcast 2 - How to Adjust Your Water - Podcast 3 - Adjusting Water to Styles - Podcast 4 - The Final Answers


While I'm hoping that Beer Tools will have some practical calculations or at least have the ability to document brewing water adjustments, it seems there's a good spreadsheet available that's based on John Palmer's brewing water calculations.  There's a link to the spreadsheet on the forums over at Homebrew Talk.  I know at least two other members in my homebrew club use this spreadsheet. Here it is:  EZ Water Adjustment spreadsheet

Last, I'm wondering if anyone has tested our local water.  A few searches led me to a lab that can do water analysis.

Brew Year's Resolution #2 - Brewing Software
As for my other Brew Year's Resolution, Beer Tools it is!  There's some users out there that have described it as a steeper learning curve than ProMash or Beer Smith but have also explained its utility as an equivalent for brewing software.
Beer Tools Software
Beer Tools had an end-of-year deal to those that signed-up for the 30-Day Trial.  That seemed to seal the deal!  Here's a link to their Overview of Beer Tools Pro 1.5.

I will certainly outline my adventures in brewing water and using Beer Tools here throughout the year.  Homebrewing has been, at foremost, a hobby.  For a handful of us, its an obsession.  I dream in homebrew!  Cheers to all and Happy Brew Year's!

Thursday, November 25, 2010

Smoked Porter, November 23, 2010

I've brewed up a couple of Smoked Porters earlier this year with great success.  The first was an Agave Smoked Porter utilizing the agave as an adjunct, great beer.  The second time, I tried a different approach on Smoked Porter with fantastic results.  Although I felt the second beer was nearly my ideal Smoked Porter, I changed it up based on my current holdings.  As with many beers, recipe formulation is often limited to what's in stock at home and/or what's available at my local homebrew store.  The one element we didn't like from the last Smoked Porter was the flavor profile imparted by the yeast, WLP007 Dry English Ale.  In my opinion, you simply can't go wrong with WLP001 California Ale and I always feel that most ale recipes need a try with this strain (here's just another good reason I'd like to upgrade to a 10 gallon system, experimenting side-by-side [same wort split into two carboys each fermenting with different yeast strains] would be insanely fun!).
As far as competition is concerned, luckily I don't really need to follow any specific guidelines.  Quoted below is the category guidelines for smoked beer.  Since this homebrew recipe does not follow any classic styles, I can easily blanket the underlying style as a "Porter".
IF THIS BEER IS BASED ON A CLASSIC STYLE (E.G., ROBUST PORTER) THEN THE SPECIFIC STYLE MUST BE SPECIFIED. CLASSIC STYLES DO NOT HAVE TO BE CITED (E.G., “PORTER” OR “BROWN ALE” IS ACCEPTABLE). THE TYPE OF WOOD OR OTHER SOURCE OF SMOKE MUST BE SPECIFIED IF A “VARIETAL” CHARACTER IS NOTICEABLE.

On another note, I've been having a great time utilizing the Wort Chiller with Recirculation Combination.  With cooler weather in San Diego, there has also been a significant drop in tap water temperatures.  Today, I was able to reduce a boiling wort to 63°F in 20 minutes using slightly less than 20 gallons of water (I use this hot/warm/cool effluent for washing and rinsing).  At the end of chilling, I pump out the wort rather quickly to a carboy.  Check it:
After chillindamos, the March Pump and recirculation arm quickly transfer the wort to a carboy.

Pumping wort is not only fast, it seems to do a fairly decent job of aerating as well.

Smoked Porter
BJCP 22B. Other Smoked Beer
5 Gallons, All Grain, Single Infusion Mash, 90 Minute Boil

9 lbs. Domestic 2-Row
2 lbs. Red Wheat
2 lbs. German Rauch Malt
0.7 lbs. UK Chocolate Malt
0.75 lbs. Crystal 20
0.25 lbs. Crystal 60
4.5 oz. Carafa II
2.5 oz. Dark British Crystal

Single Infusion Mash
(1 qt./lb. raised to 167°F)
Saccharification Rest at 148-150°F for 70 minutes
Fly-sparged 5.5 gallons at 170°F

1.5 oz. Homegrown Chinook 60 min.
0.75 oz. Spalt 20 min.
1 Whirlfloc Tab 20 min.
0.5 oz. Spalt 10 min.

White Labs WLP001 California Ale Yeast   2 vials (thanks Kara)

OG: 1.063 @ 62°F
FG: 1.013 @ 66°F
ABV: 6.7%

Sunday, October 3, 2010

Free the Shine

Wish I could join the art.  Local distiller and brewer featured in the video.  Check it. 

Anchor Brewing Company Tour

Early August, I did a bit of a road trip visiting friends and stopping at some locations where liquid chillindamos is made.  Amongst numerous wineries in the Russian River areas, a visit was also made to Moylan's Brewing, Russian River Brewing, and Anchor Brewing.  I love Anchor Steam.  Its been on my top 10 since I had it for the first time in the late 90's.  I really enjoy brewing the beer style, California Common, and think my interpretation holds very well in a side-by-side.  Needless to say, I was really excited to see this historic brewery.
A tour at Anchor Brewing is free but you'll need to schedule an appointment in advance.  Its fairly easy to call them and find out their availability.  I made reservation about a month out for a Tuesday morning in August. They seemed to be booked solid during the summer so plan accordingly.
Anchor Brewing houses their entire operation in this building.  Turns out that Fritz Maytag (former owner and brewmaster) had his last official day at the brewery the Friday before I was here.  Darn, it would have been great to get a picture with this brewing hero.  Our guide told us that the new owners and management arrive the following day to ensure the continuation of the Anchor tradition.
Their brewing room and tasting area are the only allowable locations to take photos but there are lots of videos out there, including ones on the Anchor Brewing website, that show what takes place beyond these images.  Their brewing system is classic and elegant.  The office space in the back houses their laboratory equipment.  I took notes on a handful of details such as the temps in their open fermentation room and the varieties spotted in the hop room.  Turns out that videos describe those details too!
The tour doesn't take long and our guide didn't flourish on any details of their quintessential California Common flagship, Anchor Steam.  I asked for lagering temps and times and even the guide wasn't aware of the details.   Last, they bring the group back to the above tasting area for some generous samples of their entire flight.

Anchor Brewing Company: A conversation with craft beer pioneer Fritz Maytag


Tuesday, August 10, 2010

Munich Helles, 8-9-10

Ahhh, helles yeah!  Time to break-in our new Lager Cave with a number of brews where chillindamos is a necessity.  I'm stocked in German malts and hops right now and would like to get 6 lagers underway by the end of the month.  I'm hoping to use September as a lagering month with kegging and dispensing ready for Oktoberfest.  I've never brewed this style before but got a fairly decent scope of the beer design from some reading and a focused podcast on the style (The Jamil Show - Munich Helles).
As with any new brewing adventures, I like to do thorough "research".  I picked up a couple of commercial examples of the style and damn, this beer is awesome.  I could truly drink Munich Helles all day!  The bready, toasty, malt profile is just my thing.  The flavor is balanced with a nice noble hop bittering and subtle flavor.  It dries gently, demanding your palette to beg for more.  Dangerously, I can drink lots of this and that's probably why the German's drink this beer style by the liter.  I first had the Weihenstephaner, their Original Premium.  They claim to be the world's oldest brewery with a date on the bottle "Siet 1040".  Obviously, they had plenty of time to perfect this brew.
Weihenstephaner Original Premium, a commercial example of Munich Helles.
Weihenstephaner, the world's oldest brewery, since 1040.
Weihenstephaner Original Premium Munich Helles.  Awesome looking beer! Not all fizzy-yellow-stuff is bad.
I also had a Paulaner Original Munich.  Paulaner and Spaten both claim the title to have brewed the first lagers.  The profile of this beer was similar to that of the Weihenstephaner though more focused on the slightly sweet pilsner malt flavors.  Very balanced and extremely drinkable.  I certainly enjoyed the Weihenstephaner more but would readily go through a few liters of either of these fantastic brews.

Paulaner Original Munich, a commercial example of Munich Helles.
I'm digging the neck labels of these two beers.  Their shapes are similar.  Any reason?

Another great looking Munich Helles, Paulaner Original Munich.

Munich Helles, 8-9-10
BJCP Category 1D. Munich Helles
5 Gallons, All Grain, Single Infusion Mash, 90 Minute Boil

9 lbs. German Pilsner
0.75 lbs. Munich
2 oz. Melanoidin

90 Minute Single Infusion Mash 150°F

1.35 oz. Hallertauer 60 min.
1 Whirlfloc tab 20 min.

White Labs WLP830 German Lager Yeast (thanks, Kara!), Vial to 900ml Starter
Primary Ferment at 52°F

OG: 1.050 @ 68°F
FG: 1.010 @ 46°F
ABV: 5.5% (temperature corrected)

Update 8/24: Racked to secondary.  Current gravity is 1.0105 @ 71°F (diacetyl rest).   Lagering will begin in a couple of weeks.

Evaluation: I took this to QUAFF's evaluation panel on November 17th.  Of the 5 beers I brought for feedback, this one seemed to be the best example of the style.  Harold searched for signs of improvement but only suggested to re-brew this in January for NHC first round.  That was good news to hear!

Saturday, July 17, 2010

Coming Soon: The Lager Cave

Utilizing space in my kegerator for lager fermentation and lagering has long been detrimental to the necessary activity of dispensing and consuming homebrew.  The kegerator simply does not have room for both activities.  Even if you combine both fermentation/lagering and dispensing of kegs, the kegerator spends a large portion of time at about 52°F.  That's not ideal dispensing temperature, very unchillindamos.
My brother-in-law, Ed, recently purchased a condo in the neighborhood.  He's a few blocks from Toronado to boot!  As a fellow homebrewer, he shares the like desires for making lagers.  We went halfzies on a new 24.9 cu. ft. chest freezer that will thrive in his garage.  I purchased this Kenmore Elite Chest Freezer online with Sears through a partner link; timing a sale for a great deal.  We should be picking this up within a week and will Christen it, The Lager Cave. Very chillindamos!
Coming Soon: The Lager Cave
Update 7/21/10: We picked up The Lager Cave and delivered to its new home yesterday evening. We need to wire a new electrical box and better seal Ed's garage, planned for this weekend. A Temperature Controller II is on its way.  The Honey Kolsch is nearly ready and I have a fury of lagers planned.

Sunday, February 28, 2010

Los Abuelos Fortaleza Tequila

Guillermo and I with the Fortaleza Los Abuelos Tequila line-up.
I spend most Monday's at our local tequila bar, Cantina Mayahuel.  Needless to say, I've tried numerous tequilas and have learned so much from this gem in our community.  By far, Fortaleza (labeled Los Abuelos in Mexico) is my favorite.  Their blanco is undoubtedly the best.  A few have come close and I  challenge any new potentials to a side-by-side with Fortaleza.  In a Margarita, Fortalez Blanco gives the famed cocktail life, flavor, and smoothness.  While there is lots of competition for reposados and añejo, Fortaleza holds their own at the top of those lists as well.  While other distillers seem to have inconsistency among the types of tequila they offer, Fortaleza has a distinctive character present in all three of their tequilas.
Not long ago, we were fortunate to meet Guillermo Sauza, the General Manager of Fortaleza.  He sat down and chatted with us for at least an hour, answering our technical and whimsical questions centered around tequila production.  Great guy and with all that tequila he has at hand, there's certainly not a shortage of chillindamos!

Big Bottle Birthday

Inebriated adventures are in abundance around here.  Much so that I quickly get behind in blogging all the shenanigans.  Though my Big Bottle Birthday happened nearly two months ago, I had to post a couple of pics of that epic mid-week night.  Among other bottled beers we consumed that evening, the main event was a 6L bottle of Duvel:
Of course, we had help from family and friends.   Soon after dusting the bottle, the party got so out of hand that they had to shut down the grid.  The neighborhood went dark and we were forced to continue drinking games under candle light.
As to be expected, the 2007 Duvel was really good.  It was picked up at Hi-Time Wine Cellar in Costa Mesa, CA.  Hi-Time is a gem in Orange County and while this particular bottle wasn't inexpensive, they typically have reasonable prices and a great selection.  Big bottled beer is not economical, but hey, it was my birthday!   What does one do with an empty 6L bottle?  Not sure.  Got ideas?

Wednesday, January 27, 2010

Winter (drinking) Games


Let the games begin! Every winter season, a sizable group of my friends collect in the San Bernardino mountains for some harmless debauchery, frivolity, and well deserved chillindamos. Over the years, we've sustained a number of inebriated adventures and games, developing a repertoire of winter events that require intense training and sophisticated equipment.
I'll start with homebrew since athletes must be fueled. 30 Gallons of homebrew arrived in Big Bear along with some other guest intoxicants. These beers were brewed during the epic 8 batch weekend in November. Among the beers brought, the Blueberry Wheat was rapidly consumed and with its hidden ABV of 6.8%, certainly gave us the sustained energy that no 'power drink' could ever provide. Andrew, above, enthusiastically topped his Blueberry Wheat with fresh blueberries (because anti-oxidants are important too).
Beer doesn't always travel well in bulk but thankfully my brother-in-law Tom hooked me up with a mini-keg of Faultline Brewing's Pale Ale. After being snow-chilled, we took out the mini-keg for some inebriated sledding. Above is Dave pouring a Faultline pint (not far from the San Andreas fault too). Minutes later, Dave was surfing a toboggan at record speeds.
Michelle showed intense athleticism, donning two sleds to break speed records. Just look at that smile, obviously chillindamos!
After a day of competition speed sledding, we resorted back to life, The Game of Life. We find this circa 1960's LIFE to be a far stretch from our reality so a number of squares have been modified to make this another gem of our winter games. Where's the skill, you ask? Well, every "Car Crash" demands a social. Do you know how hard it is to keep those little blue and pink pegs in those tiny plastic cars? With homebrew involved and the social interaction of cash stealing, tipsy spinning, trash talking, and child auctioning, the car crash is imminent at every bend in the road of LIFE.
The culmination of our Winter Games ended with a legendary game of Sloshball. The game is centered around casual baseball rules. About thirty inebriated athletes took the field where the main rule is to 1. have a beer in hand at all times.
If you've never played Sloshball before, here's the rest of the rules. 2. There's a keg on second base. While most find the yellow fizzy variety sufficient, we upped the quality to something more local, Bayhawk Brewing's Blonde. The fact is that more beer is spilled than is consumed so you must plan accordingly. VERY IMPORTANT: don't use or spill homebrew, that is bad!
Above is homebrewer and wine maker, Dave (Comrade from brewcommune), "warming up" before the big game. 3. All runners must stop at second base, finish their beer, and refill before proceeding to third base. 4. It does not matter how many team members are on second base but if no one can bat, your team gets an automatic third out.
Beware of seasoned veterans like Wesley (above) that can readily advance to second base and pound a brew in a moments notice.
Michelle's also dangerous with insane sloshball skills that one can only acquire from UCSB (in our book, U Can Study Buzzed).
Most athletes seem to be very focused and intense but as you can see from me batting above, Sloshball is above all, chillindamos!

Image Source: De Coubertin, Pierre, and Pumbaa80. The Symbol of the Olympic Games. Digital image. Winter Olympic Games. Wikipedia, the free encyclopedia. Web. 28 Jan. 2010. http://en.wikipedia.org/wiki/Winter_Olympic_Games.