Sunday, February 20, 2011

Belgian Lager, February 6, 2011

White Labs has a new platinum yeast strain available right now (January-February) that I want to try out: White Labs WLP815 Belgian Lager Yeast.  I thought I'd try busting the BJCP guidelines for a generously hopped lager using this strain.  Hoppy lagers are rare and it this brew should be a great testament to using water adjustments to match the lighter malts while accentuating the bitterness.  Here's White Lab's description of WLP815:
WLP815 Belgian Lager Yeast
Clean, crisp European lager yeast with low sulfur  production. The strain originates from a very old brewery in West Belgium. Great for European style pilsners, dark lagers, Vienna lager, and American style lagers.
Attenuation: 72-78%
Flocculation: Medium
Optimum Fermentation Temperature: 50-55°F (10-12°C)
Alcohol Tolerance: 5-10%
Water Chemistry Planning:
With water chemistry for this batch, playing with the numbers landed me with blending 20/80% of my tap water with purified drinking water from The Water Lady.  I also added to the mash 2 grams of gypsum to give a gentle boost to the calcium and sulfate concentrations.  (Note to self - 1 teaspoon of Gypsum is 4 grams.) 
Adjusted mash chemistry after blending water sources and gypsum.
Above and below are snapshots of my Step 7 from Palmer's water calculator (Version 2).  Maybe someone out there can help me understand this, why do I often see negative values for residual alkalinity? Even with this mystery, looks like I'm in the ballpark.    According to Jamil and John in Brew Strong's Waterganza podcast series on The Brewing Network, getting in the the desired range is good enough.  The calculator shows that my target residual alkalinity range for an 8 SRM beer should be in the range from -25 to 34.  Again, what do negative values mean!?
Why do I keep seeing negative values for residual alkalinity?
Creating a Mashing Schedule Using BeerTools Pro:
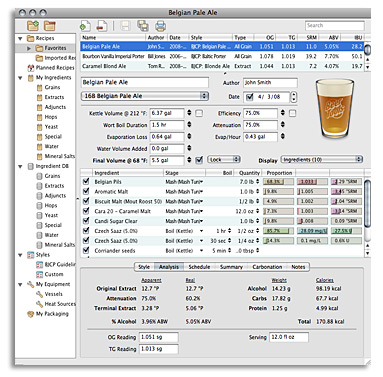
Along with my new experiences with water adjustments, I'm also trying to tailor BeerTools Pro to my brewing process.   My latest challenge using this brewing software is with calculating mash volumes and resulting temperatures.  With this beer, I wanted to do a multi-step infusion involving a short protein rest.  My experience with my equipment led me to my target temperatures for the protein and saccharification rests but I really want the software to do work for me!
Mashing Schedule snapshot from BeerTools Pro.
For my next batch, I need to pay attention more to volumes since I'm certain that I collect more than 5.51 gallons in my kettle after the sparge.  To get the above values, I had to do lots of tweaking with numbers.  Maybe since I was working backwards (actual values of water infusions and temperatures) rather than forward planning?  I'll document temps and volumes a bit more closely next time and see if can better calibrate the software to my process.

Quick Protein Rest:
With lagers, especially when using pilsner malt, I have been doing a quick protein rest (between 122-124°F) at the start of my mash.  Previously, I was doing the rest for about 20 minutes but a discussion with an esteemed QUAFF colleague, Harold Gulbransen, convinced me to to  shorten the rest as much as possible.  Here's my refined protein rest procedure that gets me in and out of a protein rest within about 7 minutes:
Using 0.9 quarts per pound of grain, raise water to 135°F and pour into mash tun.  Add any salts and grain.  Stir to break up and clumps and distribute temperature.  Simultaneously heat additional water to boil at a rate of 0.5 quarts per pound of grain.  After about 2 minutes of stirring, I check the mash temperature (usually hits 122°F).  In less than 5 minutes, my second infusion water is at a boil.  When boiling, I add this infusion to the mash tun and stir for about 2-3 minutes to distribute the heat evenly.  After stirring, check temperature (usually 148-152°F). 

Hey BeerTools Pro, as for the HTML export below, I find myself editing the code to clean up the "look" quite a bit.  I would really like the ability to create an export template to customize the elements and appearance.  Could you please consider this feature for future updates!?

Will update actual Final Gravity and finishing details later!

Belgian Lager

BJCP Category 23-A Specialty Beer
Author: Chillindamos
Date: 2/6/11
BeerTools Pro Color Graphic
Size: 5.0 gal
Efficiency: 70.04%
Attenuation: 77.8%
Calories: 178.9 kcal per 12.0 fl oz

Original Gravity: 1.054 (1.026 - 1.120)
|============#===================|

Terminal Gravity: 1.012 (0.995 - 1.035)
|==============#=================|

Color: 7.9 (1.0 - 50.0)
|==========#=====================|

Alcohol: 5.51% (2.5% - 14.5%)
|============#===================|

Bitterness: 82.0 (0.0 - 100.0)
|=====================#==========|

Ingredients:

7.0 lb Belgian Pils
3.0 lb Belgian Munich
1.0 lb Vienna Malt
1.0 tsp 5.2 pH Stabilizer - added during mash
1.0 tsp Anti-foam - added during boil, boiled 90.0 min
1.0 oz Magnum (14.5%) - added during boil, boiled 60.0 min
1.5 oz Czech Saaz (5.0%) - added during boil, boiled 15.0 min
1.5 oz Spalt (4.8%) - added during boil, boiled 15.0 min
1.0 oz Czech Saaz (5.0%) - added during boil, boiled 1.0 min
1.0 oz Spalt (4.8%) - added during boil, boiled 1.0 min
1.0 tsp Whirlfloc Tablets (Irish moss) - added during boil, boiled 20.0 min
2.0 ea White Labs WLP815 Belgian Lager Yeast

Schedule:

Ambient Air: 70.0 °F
Source Water: 60.0 °F
00:07:57 Mash-In - Liquor: 2.47 gal; Strike: 138.5 °F; Target: 123 °F
00:12:57 Protein Rest - Rest: 5.0 min; Final: 122.7 °F
00:14:57 Second Infusion - Water: 1.35 gal; Temperature: 212.0 °F; Target: 149.2 °F
01:12:57 Saccharification Rest - Rest: 58.0 min; Final: 145.8 °F
01:15:57 Mash-Out Infusion - Water: 1.28 gal; Temperature: 170 °F; Target: 151.1 °F
01:25:57 Vorlauf, bitches! - Rest: 10.0 min; Final: 150.6 °F
02:55:57 Fly Sparge - Sparge Volume: 5.1 gal; Sparge Temperature: 170.0 °F; Runoff: 5.82 gal

Notes

OG 1.054 @ 68°F. Uses 77% premium drinking water from The Water Lady and 33% filtered San Diego Alvarado water. 2 grams of Gypsum added to the mash. Primary ferment in the lager cave at 52°F fin a 6 gallon better bottle for 2 weeks. Rack to secondary for 4 weeks at primary temps before stepping down 2°F per day to lagering temps at 38°F. Update 2/20, racked over to a secondary but didn't have my hydrometer at the lager cave to take a gravity reading. Will ramp up to 60's next week.
Results generated by BeerTools Pro 1.5.12

Saturday, February 19, 2011

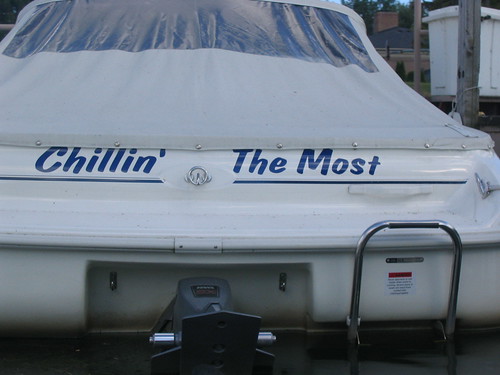
Chillin' The Most

Just did a quick search to find these gems:

My kind of shirt. Have one already!
My kind of flag. Need one.
My kind of boat. Can't afford.

Burton Ale, January 30, 2011

In this past issue of Zymurgy, Martyn Cornell and Antony Hayes outlined the ultimate English comfort beer, Burton Ale.  With Kara of White Labs also wanting to try out White Labs WLP023 Burton Ale Yeast, we decided to give this style a try.  I don't recall ever having a Burton Ale nor do I believe it's available in our very rich beer community of San Diego.  I suppose in the earlier days of homebrewing of Dave Line and Charlie Papazian, you would simply need to make a style just to be able to try it.
Burton Ale: A British Comfort Beer - Article from Zymurgy Vol. 34 No. 1
I would like to do more long term projects like this one.  In the article, Cornell and Hayes explain that aging is an important component to Burton Ales and suggest a year to 18 months.  I will do just that.  My only limitation is that our house tends to warm up quite a bit towards the end of summer.  At this time, I will transfer the beer to a Cornelius keg and continue aging in my kegerator or the lager cave.

As for using water adjustments as per my Brew Year's Resolution, I tried to follow the suggested recipe guidelines for this beer.  Total Alkalinity (as Calcium Carbonate) between 100-120ppm and free calcium between 180-220ppm.  Using the Palmer's water calculator, I determined that my San Diego water would be a good starting point.  I played with salt adjustments and decided to add Gypsum and Epsom Salts to the mash water.  Calculated based on annual average analysis of my tap water, the additions will give an adjusted calcium of 183ppm and a residual alkalinity as calcium carbonate at 124ppm.  Sulfates are in the red (565ppm) from these additions though it seems acceptable to the Burton on Trent water profile that this beer is based on.
Could have used some anti-foam or a blow-out tube for this Burton Ale.
I will follow up with details here as the year progresses though as with any long-term project, it's best to just forget about it!  I have two other long-term beers in progress: American Barley Wine and an Oud Bruin.  Forget about those too!

Burton Ale

BJCP Category 19-A Old Ale
Author: Chillindamos
Date: 1/30/11
BeerTools Pro Color Graphic
Size: 5.0 gal
Efficiency: 69.7%
Attenuation: 78.7%
Calories: 266.52 kcal per 12.0 fl oz

Original Gravity: 1.080 (1.060 - 1.090)
|==================#=============|

Terminal Gravity: 1.017 (1.015 - 1.022)
|============#===================|

Color: 17.82 (10.0 - 22.0)
|==================#=============|

Alcohol: 8.32% (6.0% - 9.0%)
|====================#===========|

Bitterness: 112.3 (30.0 - 60.0)
|================================|

Ingredients:

13.0 lb Maris Otter Pale
1.0 lb Belgian Munich
4.0 oz American Chocolate Malt
1.0 tsp 5.2 pH Stabilizer - added during mash
1.0 lb Light Brown Sugar
6.0 oz East Kent Goldings (5.0%) - added during boil, boiled 60.0 min
2.0 oz East Kent Goldings (5.0%) - added dry to secondary fermenter
1.0 tsp Whirlfloc Tablets (Irish moss) - added during boil, boiled 15.0 min
2.0 ea White Labs WLP023 Burton Ale

Schedule:

Ambient Air: 70.0 °F
Source Water: 60.0 °F
Elevation: 0.0 m
00:14:54 Mash-In - Liquor: 3.56 gal; Strike: 172.25 °F; Target: 152.0 °F
01:14:54 Saccharification Rest - Rest: 60 min; Final: 148.2 °F
01:24:54 Vorlauf, bitches! - Rest: 10.0 min; Final: 147.6 °F
02:34:54 Fly Sparge - Sparge Volume: 5.1 gal; Sparge Temperature: 170.0 °F; Runoff: 7.02 gal

Notes

Added 7 grams of Gypsum and 3 grams of Epsom Salts to the mash tun using 100% San Diego Alvarado filtered water. OG: 1.080 @ 68°F Used two vials of WLP023 to make a 900ml starter the night before. Stir plate used. Oxygenated wort for 60 seconds. Primary ferment in 6 gallon Better Bottle at ambient household temperatures (60-63°F). Blow out for nearly two days! Will age in secondary for at least 5 months before kegging. Cold age in the keg for another 6 months or so. Dry hop with 2oz. East Kent Goldings two week prior to full carbonating pressure for serving. Update 2/23: Racked the Burton Ale over to secondary. Current gravity is 1.017 @ 58°F. It will age here until my cellaring location in the house warms up too much.
Results generated by BeerTools Pro 1.5.12

BeerTools Pro Needed Features
Hey, BeerTools Pro!  I'd like to customize a template for exporting to HTML.  Could you do this please!?  In this template, I'd like to have the option to turn on/off components and stylize the way I want it to display.  I would like to be able to add water chemistry and fermentation details (including aeration/oxygen) to the export.  Other stuff - adjusted gravity based on an input temperature, water and salts as ingredients, fermentation details (vessels, temps, racking, time), adding dry hopping along with its' time and method, yeast pitching rate calculator for starters etc. based on OG and yeast type as on Jamil's website (Jamil's Yeast Pitching Rate Calculator).

References:
Cornell, Martyn, and Antony Hayes. "Burton Ale: A British Comfort Beer." Zymurgy 34.1 (2011): 22-25. Print.

Sunday, February 13, 2011

Blueberry Wheat, Special Edition, February 10, 2011

Alas!  It has been way to long.  I've been spending a huge chunk of time focusing on my Brew Year's resolution to make brewing water adjustments and to use software for planning and process documentation.  In doing so, I've missed blogging two other brewing sessions besides this one.  Those two future blog entries, Burton Ale and Belgian Lager, will be posted very soon.  I've seemed to finally grasp the basics of using John Palmer's water RA spreadsheet and using BeerTools Pro for Mac.
As for making water adjustments, I've taken the recommendation from several homebrewers to use John Palmer's Mash Residual Alkalinity Spreadsheet.  Here's the download link to the Excel spreadsheet if you want to try it out: Palmers_Mash_RA_ver2.xls.  There's also a very recent update but I haven't checked it out yet: Palmers_Mash_RA_ver3ptO.xls.  If you do some reading about Palmer's spreadsheet and water calculations, you'll find that there's a great discussion happening about technical/chemical issues with his calculations, hence version 3.  Even with the new version, there still seems to be some unanswered questions and potential issues.

Using the spreadsheet takes some initial learning but I found no harm done playing with several scenarios before trying it out for actual planning purposes.  I found it very useful to listen to the Brew Strong Waterganza podcast series on The Brewing Network: Podcast 1 - Why Adjust Your Water - Podcast 2 - How to Adjust Your Water - Podcast 3 - Adjusting Water to Styles - Podcast 4 - The Final Answers  After picking up a small variety of brewing salts and starting to utilize a local purified drinking water source, it has been exciting to add water adjustments to my homebrewing repertoire. 
Here's the spreadsheet for this brew.  Simply dilutions.  No salts were needed.
This is a learning process and while this brew's water profile needs further adjustment (could have used calcium chloride), I'm excited to use water as the basis for future experimentation.  Notice that the chloride to sulfate ratio determines that hop perception will be "Bitter".  With a tad of calcium chloride, the ratio would be more "Malty" focused and better suited to the profile I'm looking for in my Blueberry Wheat.  As I said, it will be a process, and a fun one at that. 

As for using BeerTools Pro for Mac, I'm finding it easy to use and frustrating at the same time.  Time will tell if I can become acclimated and work around its' nuances.  I've found their documentation to be very useful and the calculations to be fairly accurate.  I particularly enjoyed running the experiments on my equipment to determine heat capacity and their coefficients.   Here's a quick snapshot of using BeerTools Pro with the Blueberry Wheat Ale:

BeerTools Pro snapshot showing Special Ingredients and Mashing Schedule.
One of the end products I truly desire is exporting the details for blogging purposes.  BeerTools can export straight to HTML and the results are copied below.  A couple of complaints I have are the inability to document fermentation details and that water adjustments and profiles used in their calculators can't be exported along with the other details seen below.  Perhaps these features are there!?  I haven't looked really far into these issues yet and so it seems the only way to make this happen is using the "Notes" feature.

On to the beer!  I've made a few small changes to this favorite homebrew of mine.  It's really not MY favorite, but many of my great friends absolutely love this homebrew.  I will admit that it is truly a great drinker and even an experienced beer judge has said that a previous edition was one of the best fruit beers he's ever had.  So why would I even consider changing it, you ask!?  For the fun of it, of course!  Why settle for good when great is within reach?  In this case, why settle for great when I hear water adjustments can send a beer to outstanding!?

One of my truly best friends and favorite peops, Andrew, just got engaged and this beer is for him.  The Blueberry Wheat has been his favorite homebrew and beer.  I'm plugging for an engagement party to feature this beer.  Andrew also has an amazing food blog, check it out: Eating Rules.  Cheers!
Here's the brewing details from BeerTools Pro.  I will update at a later date with finishing details. Two other blog posts for Burton Ale and Belgian Lager coming soon as well.  Oh, and I've making some Chianti from a kit and will also write about that process too!

Blueberry Wheat, Special Edition

BJCP Category 20-A Fruit Beer
Author: Chillindamos
Date: 2/10/11
BeerTools Pro Color Graphic
Size: 5.0 gal
Efficiency: 70.0%
Attenuation: 88.1%
Calories: 159.42 kcal per 12.0 fl oz

Original Gravity: 1.049 (1.026 - 1.120)
|===========#====================|

Terminal Gravity: 1.006 (0.995 - 1.035)
|============#===================|

Color: 4.2 (1.0 - 50.0)
|=========#======================|

Alcohol: 5.65% (2.5% - 14.5%)
|============#===================|

Bitterness: 16.4 (0.0 - 100.0)
|==========#=====================|

Ingredients:

6.08 lb Red Wheat Malt
2.93 lb 2-Row Brewers Malt
0.98 lb Belgian Pils
2.9 tsp 5.2 pH Stabilizer - added during mash
1.46 oz German Spalt (3.0%) - added during boil, boiled 60 min
1.0 tsp Whirlfloc Tablets (Irish moss) - added during boil, boiled 15.0 min
2. ea White Labs WLP001 California Ale
0.1 tsp Anti-Foam - added during boil, boiled 90.0 min
0.1 tsp Anti-Foam - added during boil, boiled 1.0 min
2.0 oz Blueberry Extract

Schedule:

Ambient Air: 65.0 °F
Source Water: 58.0 °F
00:11:31 Mashing-In - Liquor: 2.49 gal; Strike: 169.49 °F; Target: 148.0 °F
01:11:31 Saccharification Rest - Rest: 60 min; Final: 142.7 °F
01:14:31 Mash Out Infusion - Water: 1.54 gal; Temperature: 170.0 °F; Target: 151.7 °F
01:24:31 Vorlauf, bitches! - Rest: 10.0 min; Final: 151.0 °F
02:34:31 Sparge - Sparge Volume: 4.88 gal; Sparge Temperature: 170.0 °F; Runoff: 5.83 gal

Notes

OG: 1.050 @ 66°F Oxygen aeration for 60 seconds. Pitched two vials of WLP001 California Ale. Fermenting at 63-66°F for two weeks in the primary. After 48 hours, the Anti-Foam seems to be keeping the krausen under control. I typically have a fermentation blowout with this type of grain bill (using wheat). Water was diluted 72% using RO water. On 2/23: Racked over to secondary. Current gravity is 1.006 @ 58°F.
Results generated by BeerTools Pro 1.5.12

Friday, December 31, 2010

Happy Brew Year's

Happy Brew Year's!
2010 was a great year of homebrewing.  My primary focus was brewing to style and in doing so, I certainly expanded my brewing horizons.  Previously, I typically brewed to my heart's content.  My recipe formulation followed only rough parameters, inspired mostly by my current stock of ingredients.  Using the BJCP guidelines, I have tried to stay within target of a particular style.  Another goal was to begin participating in evaluations and competitions to gain honest feedback.  This past year, I entered a few beers in competition and sought out evaluations of my homebrew.  Honest and experienced feedback has been critical to developing my craft.
Speaking of competition!  Up until this fall, I was hoping to unleash a large handful of beers in this coming year's competition season, mostly our club-sponsored AFC competition and NHC.  With my wife's company shutting down and a little brewer on the way (end of March), we have since had to eliminate any unnecessary expenses.  Unfortunately, this means no competition entries this year.  We simply can't justify $10-$15 entry fees.  Bummer, huh?  Homebrewing on the other hand is decidedly cheaper than purchasing one of the household staples, beer.  Despite rough times, I'm just lucky to continue brewing to some extent!
Our latest "brew".  Some say it looks like he already has a beer in hand.
The New Year's brings resolutions and I have a two to address.  The first being to adjust brewing water.  At over 90% of beer volume, water takes a primary role.  The last time I considered adjusting my brewing water, I think I simply focused on the fact that many good homebrewers and some pro brewers use only their local tap water.  I've always filtered my water but haven't considered the rest of the details.  The second resolution is using brewing software.  I decided to start using Beer Tools.  I would have considered ProMash or Beer Smith and actually downloaded their trials.  I use a desktop Mac at home for all of my homebrewing digital needs: research, brewing related email, images, beer labels, calculations, blogging, and now Twitter.  Since Beer Tools is the only choice on a Mac, it was a no brainer.

My Brew Year's Resolution: Brewing Water and Software
Brew Year's Resolution #1 - Adjust Brewing Water
After 10 years of homebrewing, considering water critically as a brewing ingredient is long overdue. At this point, I'm in the research phase.  I've asked my homebrew club's email listserv to see if there's a definitive guide for adjusting water.  This simple answer was, no.  Adjusting brewing water seems to have the same range of involvement as brewing beer itself.  You can simply use tap water (or a homebrew kit) or become insanely involved.  As a science teacher with some background in chemistry, how hard can it be!?  Here's the collection of links from my QUAFF buddies:

John Palmer's How to Brew Chapter 15 - Understanding the Mash pH
Chapter 15.0 - What Kind of Water Do I Need? Chapter 15.1 - Reading a Water Report Chapter 15.2 - Balancing the Malts and Minerals Chapter 15.3 - Residual Alkalinity and Mash pH Chapter 15.4 - Using Salts for Brewing Water Adjustment

From Kai at BrauKaiser.com - Various Water Recipes - Beer color, alkalinity, and mash pH - effect off water and grist on mash pH (PDF)
Thanks Joe!

Another QUAFF member, Kim, wrote an interesting reply that I will simply quote:
Hi Sean,

I think John Palmer's How To Brew 3rd ed, chapter 15 is a great starting point for water chemistry.

In addition to Joe's links, AJ Delange has a site with a lot of technical depth (and things about Newfoundland dogs)
http://ajdel.wetnewf.org:81/ His spreadsheet is a beast! It has a 66 page users' manual for how to use it! (No, I haven't read it all.) Presumably a lot of that is theory... The alkalinity and water recipe documents may be of interest, and there are other goodies in there too.

AJ also contributes a lot on the brewnetwork's forums, especially with respect to water. Here's a (very!) recent thread about errors in John Palmer's water spreadsheet, but also about how it's not as disastrous as the bad math makes it seem: http://www.thebrewingnetwork.com/forum/viewtopic.php?f=6&t=23205 I'm hoping that the math/chemistry in the book is just fine, and that the errors are really in the formulas in the spreadsheet.

As far as I can tell, there isn't a single definitive resource for water chemistry. The lesson I get form it is that there are general correlations in the amounts of our brewing ions and the outcomes, but it's not as cut-and-dried as the formulas indicate. For example, 20ppm sulfate to 10 ppm chloride won't have the same effect as 200ppm to 100ppm. And Kai "Braukaiser" Troester's research (Joe linked to it) indicates that pound-for-pound, crystal malts actually acidify the
mash more than roasted malts, the opposite of what I had learned. You know, Dublin's classic style is stout, with generous use of roasted malts to counter the high carbonate water. Still, they are good starting points for later tweaking, just like pretty much everything else in brewing ;)

Cheers,
Kim
4-Part Podcast on Brewing Water:

On the Brewing Network, the podcast show, Brew Strong, has a four-part series on brewing water.  If you're a beer-brewing geek and haven't already found Jamil and John's awesome Brew Strong podcasts, I'd highly recommend subscribing and perusing the archives.  I've found that these podcasts are a go-to resource for exploring different aspects of brewing beer.  Here's the link to subscribe to the Brew Strong podcasts.
Another QUAFF buddy, Brian, reminded me of this "Waterganza" series on Brew Strong:
Podcast 1 - Why Adjust Your Water - Podcast 2 - How to Adjust Your Water - Podcast 3 - Adjusting Water to Styles - Podcast 4 - The Final Answers


While I'm hoping that Beer Tools will have some practical calculations or at least have the ability to document brewing water adjustments, it seems there's a good spreadsheet available that's based on John Palmer's brewing water calculations.  There's a link to the spreadsheet on the forums over at Homebrew Talk.  I know at least two other members in my homebrew club use this spreadsheet. Here it is:  EZ Water Adjustment spreadsheet

Last, I'm wondering if anyone has tested our local water.  A few searches led me to a lab that can do water analysis.

Brew Year's Resolution #2 - Brewing Software
As for my other Brew Year's Resolution, Beer Tools it is!  There's some users out there that have described it as a steeper learning curve than ProMash or Beer Smith but have also explained its utility as an equivalent for brewing software.
Beer Tools Software
Beer Tools had an end-of-year deal to those that signed-up for the 30-Day Trial.  That seemed to seal the deal!  Here's a link to their Overview of Beer Tools Pro 1.5.

I will certainly outline my adventures in brewing water and using Beer Tools here throughout the year.  Homebrewing has been, at foremost, a hobby.  For a handful of us, its an obsession.  I dream in homebrew!  Cheers to all and Happy Brew Year's!