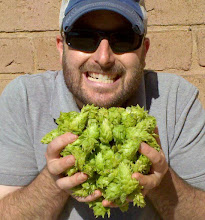
Kick Off to the Hop Farm 2010 Season
Spring, as expected, has come to California. If you drive the freeways here, you know the recent warm temps after several periods of rainfall translate to green hills and loads of flowers. Native (and adaptive) plants here know there's a short window of opportunity.
Luckily for my hop farm in Escondido, California, the soil is still moist making it easy to pull all of the unwanted weeds. Along with a quick growth, this is typically the bulk of weed pulling during the hop growing season. I knew that with all of the recent rains and warm temps, my hops are likely to be triggered for growth as well.

I had a couple of good recruits to start the initial work needed to kick off the season, Michelle and Kara (above). I think many don't realize the work that goes into such a small farm but I can ensure you that buying hops at increased pricing is still a great deal! I remember when hop prices were about $1 per ounce. No homebrewer grows hops for economy. Recently, though the previous hop shortage has subsided, hop prices at homebrew supply sources have increased to about $2 or more per ounce. If growing hops was easier and cheaper, I'm sure everyone would do it. Homebrewers grow hops because they want to follow an ingredient from the soil to their beer, ensuring the freshest flavor possible.

If you have hops already planted like me, all you really need to do is get rid of the competition. Though I heavily mulch at the end of each hop growing season, I can't seem to avoid the weeds. With moist soil right now, at least the undesirables are easy to pull. Nevertheless, its a pain in the (hands). Rain, winds, and gophers during the off season transformed the landscape and require some damage control. It simply takes labor, and a good chunk of it.
Lots need to be accomplished at the start of each season. Of course, weeding is the primary task but other tasks will follow. On the to-do list is terrace leveling, rhizome pruning, mound rebuilding, trellis maintenance, irrigation maintenance, fertilizing, mulching, and pest management.
For this particular area I need to re-level the three minor terraces. Over the winter, erosion takes its toll and the runoff during storms attempts to re-slope the farm. After weeding, I go through the rows and level out the soil. Having leveled terraces is not necessary but I find it very useful when I need to use a ladder during harvest.
While pulling most weeds by hand in moist soil seems the most effective, using a pick and hoe has been very useful. Pulling the roots of weeds is necessary since we've experienced that these weeds grow back if you simply cut them at the surface. In fact, I've experienced weed-whacked areas that not only make it difficult to remove the rest of the weed but also allows regrowth throughout the season.
After clearing the farm, I tried to rebuild the rows and some of the mounds to the best I can (the girls were in solid weed removal mode). I really need to prune the mounds this year but I'll save that until next week. Any takers for some rhizomes? To prune the mounds, I chop around the mound and pull the roots extending beyond the mound. After pruning, I rebuild the soil to form a sizable mound (typically 6-8" high).
I used to be really nervous about damage to the rhizomes but I've learned that hops are really hardy. You can hack it up, bury leaves, or even dig up the entire plant. As long as you do this at the start of the season, rebuild your mounds, and start irrigating, all rhizomes tend to recover quickly. Above you can see the chinook breaking ground.
Looks like the winter did a number on one of my support beams. Next week, I'll do a simple natural repair to squeeze more life out of this beam.


